In this post, we will show you a simple way to project a phone to a PC in Windows 10. Windows 10 provides a feature called Project to this PC which allows to project other devices on a PC installed with Windows 10.
Below are the steps for doing this.
1.Press Win + i key to open Windows Settings.
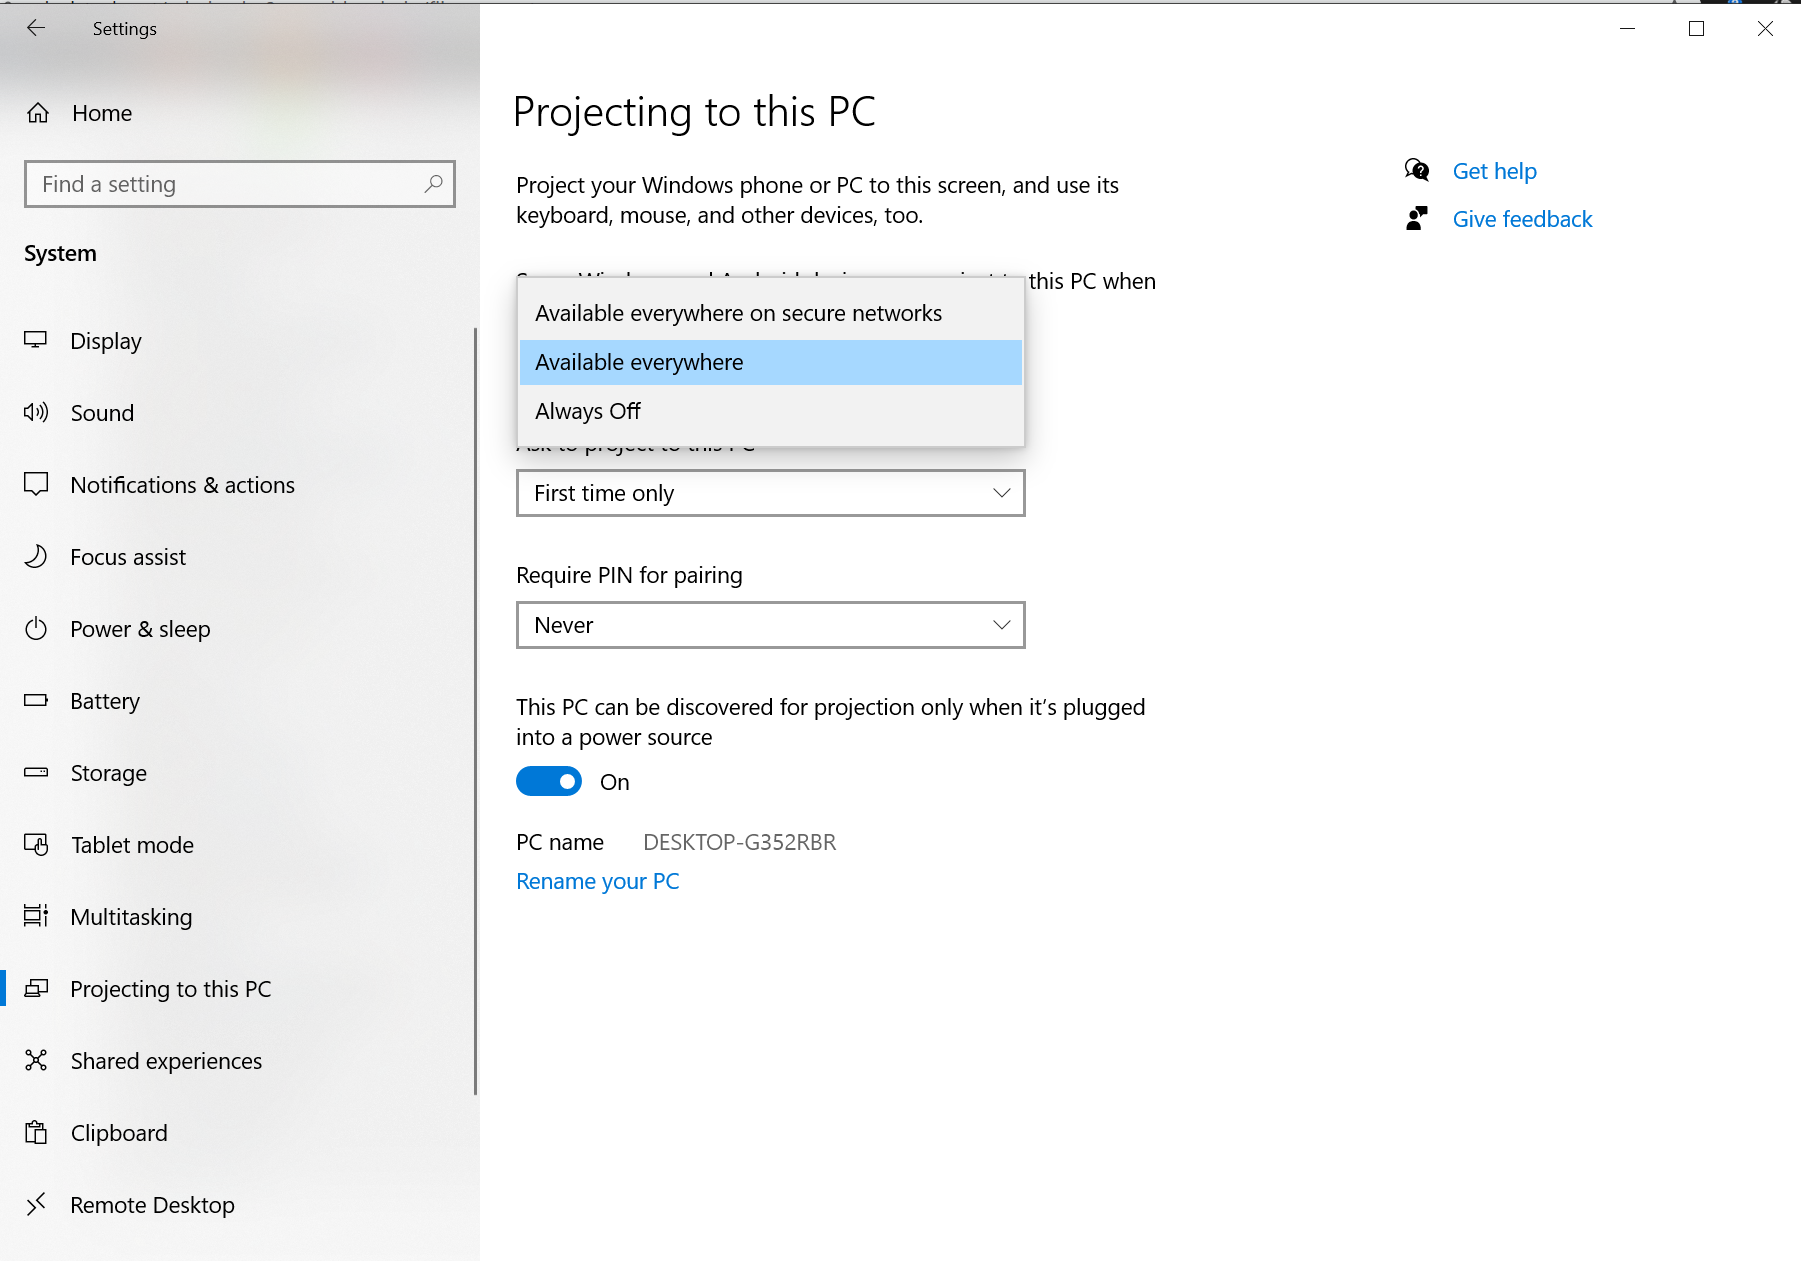
2. In System menu, click Project to this PC option. Then select either Available everywhere on secure networks or Available everywhere.
3. Now open your phone which you want to project. Ensure it connects to the same WiFi as your PC.
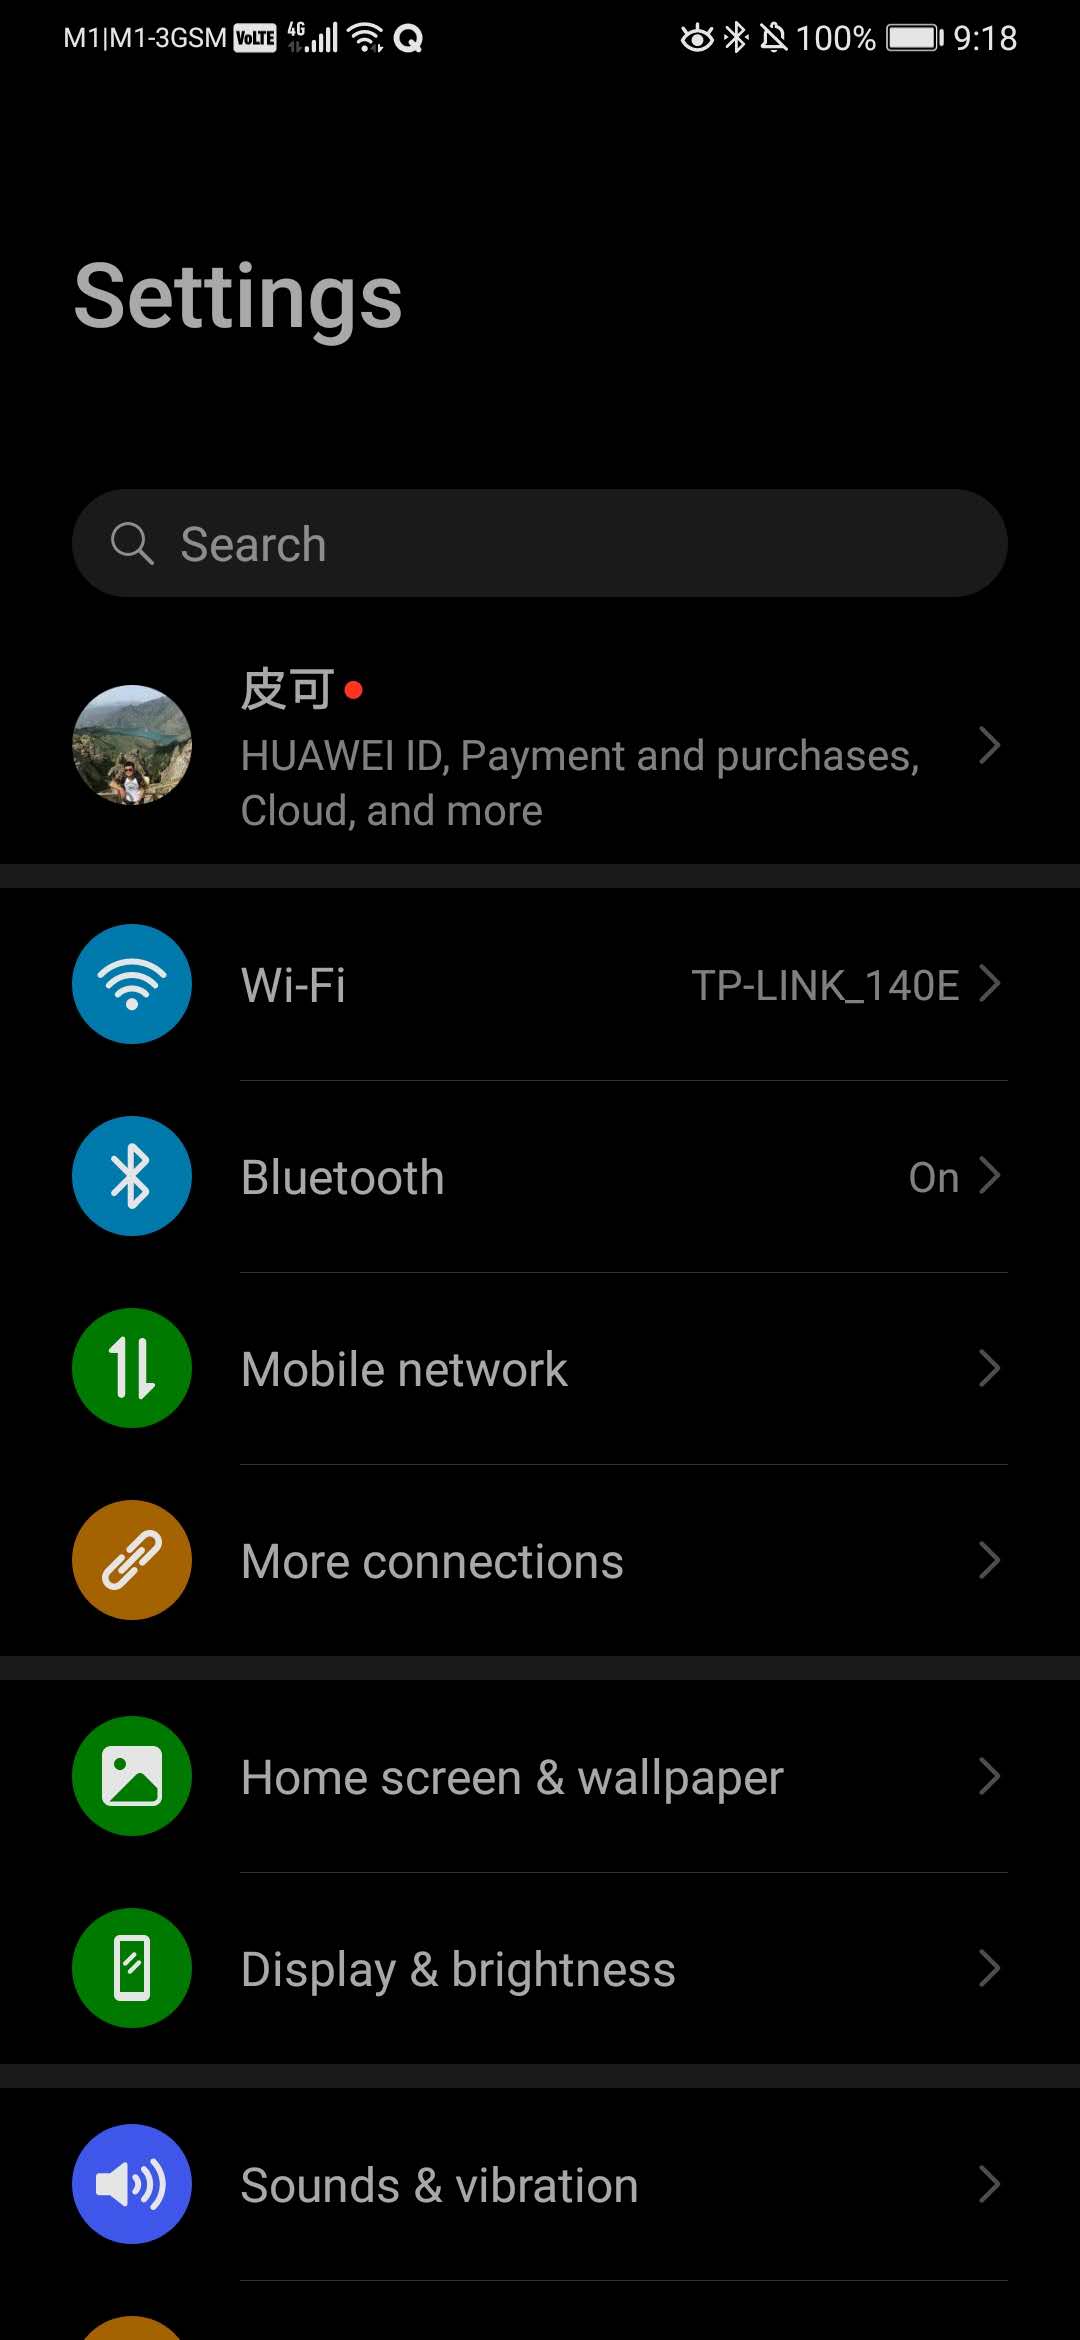
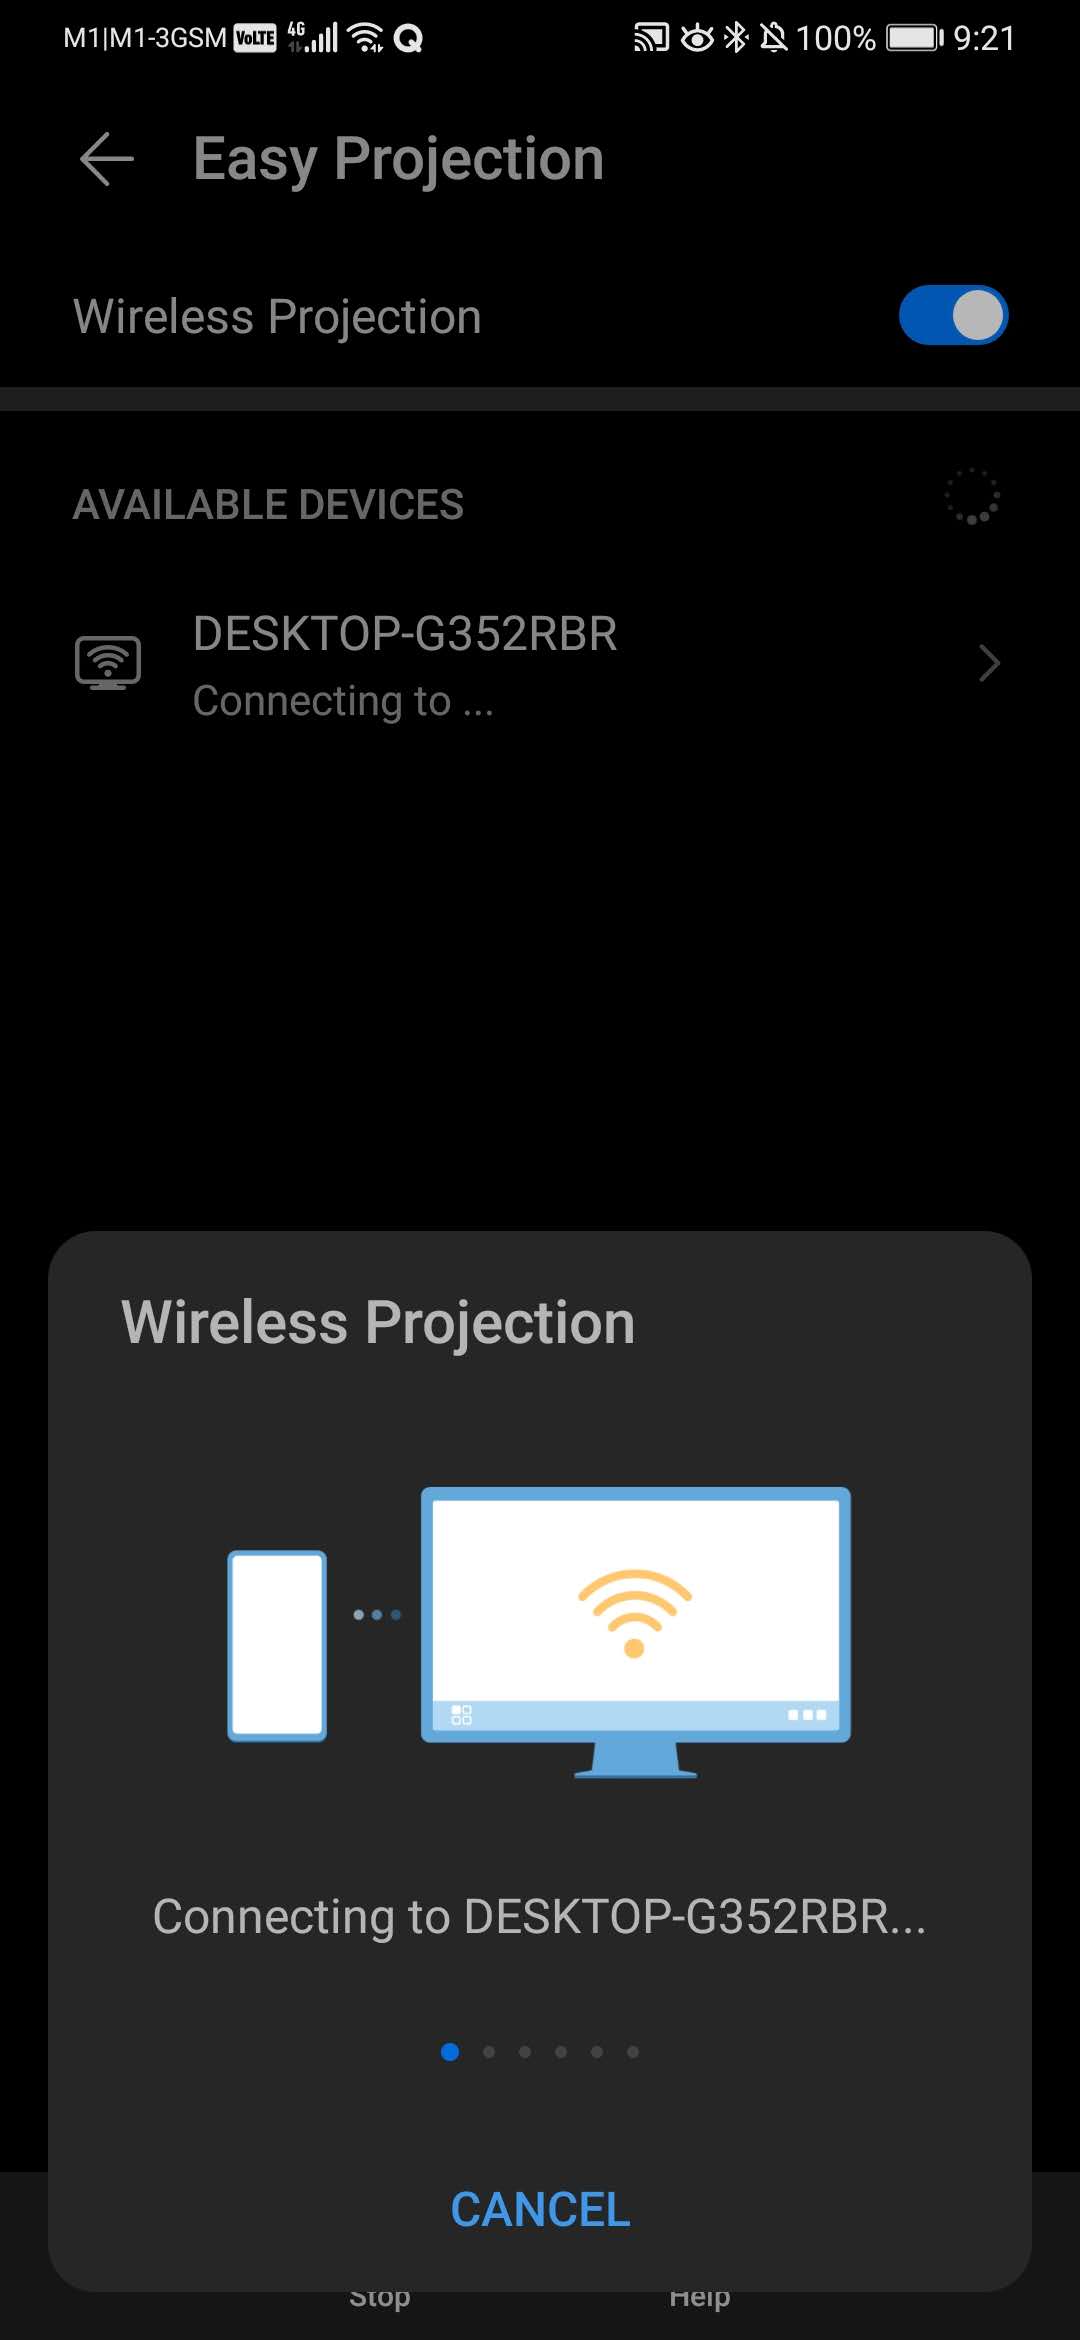
4. On your phone, go to Settings and click More connections. You will find some option called Easy Projection or similar. If you cannot, it means your phone doesn't support this feature yet and you can give up.
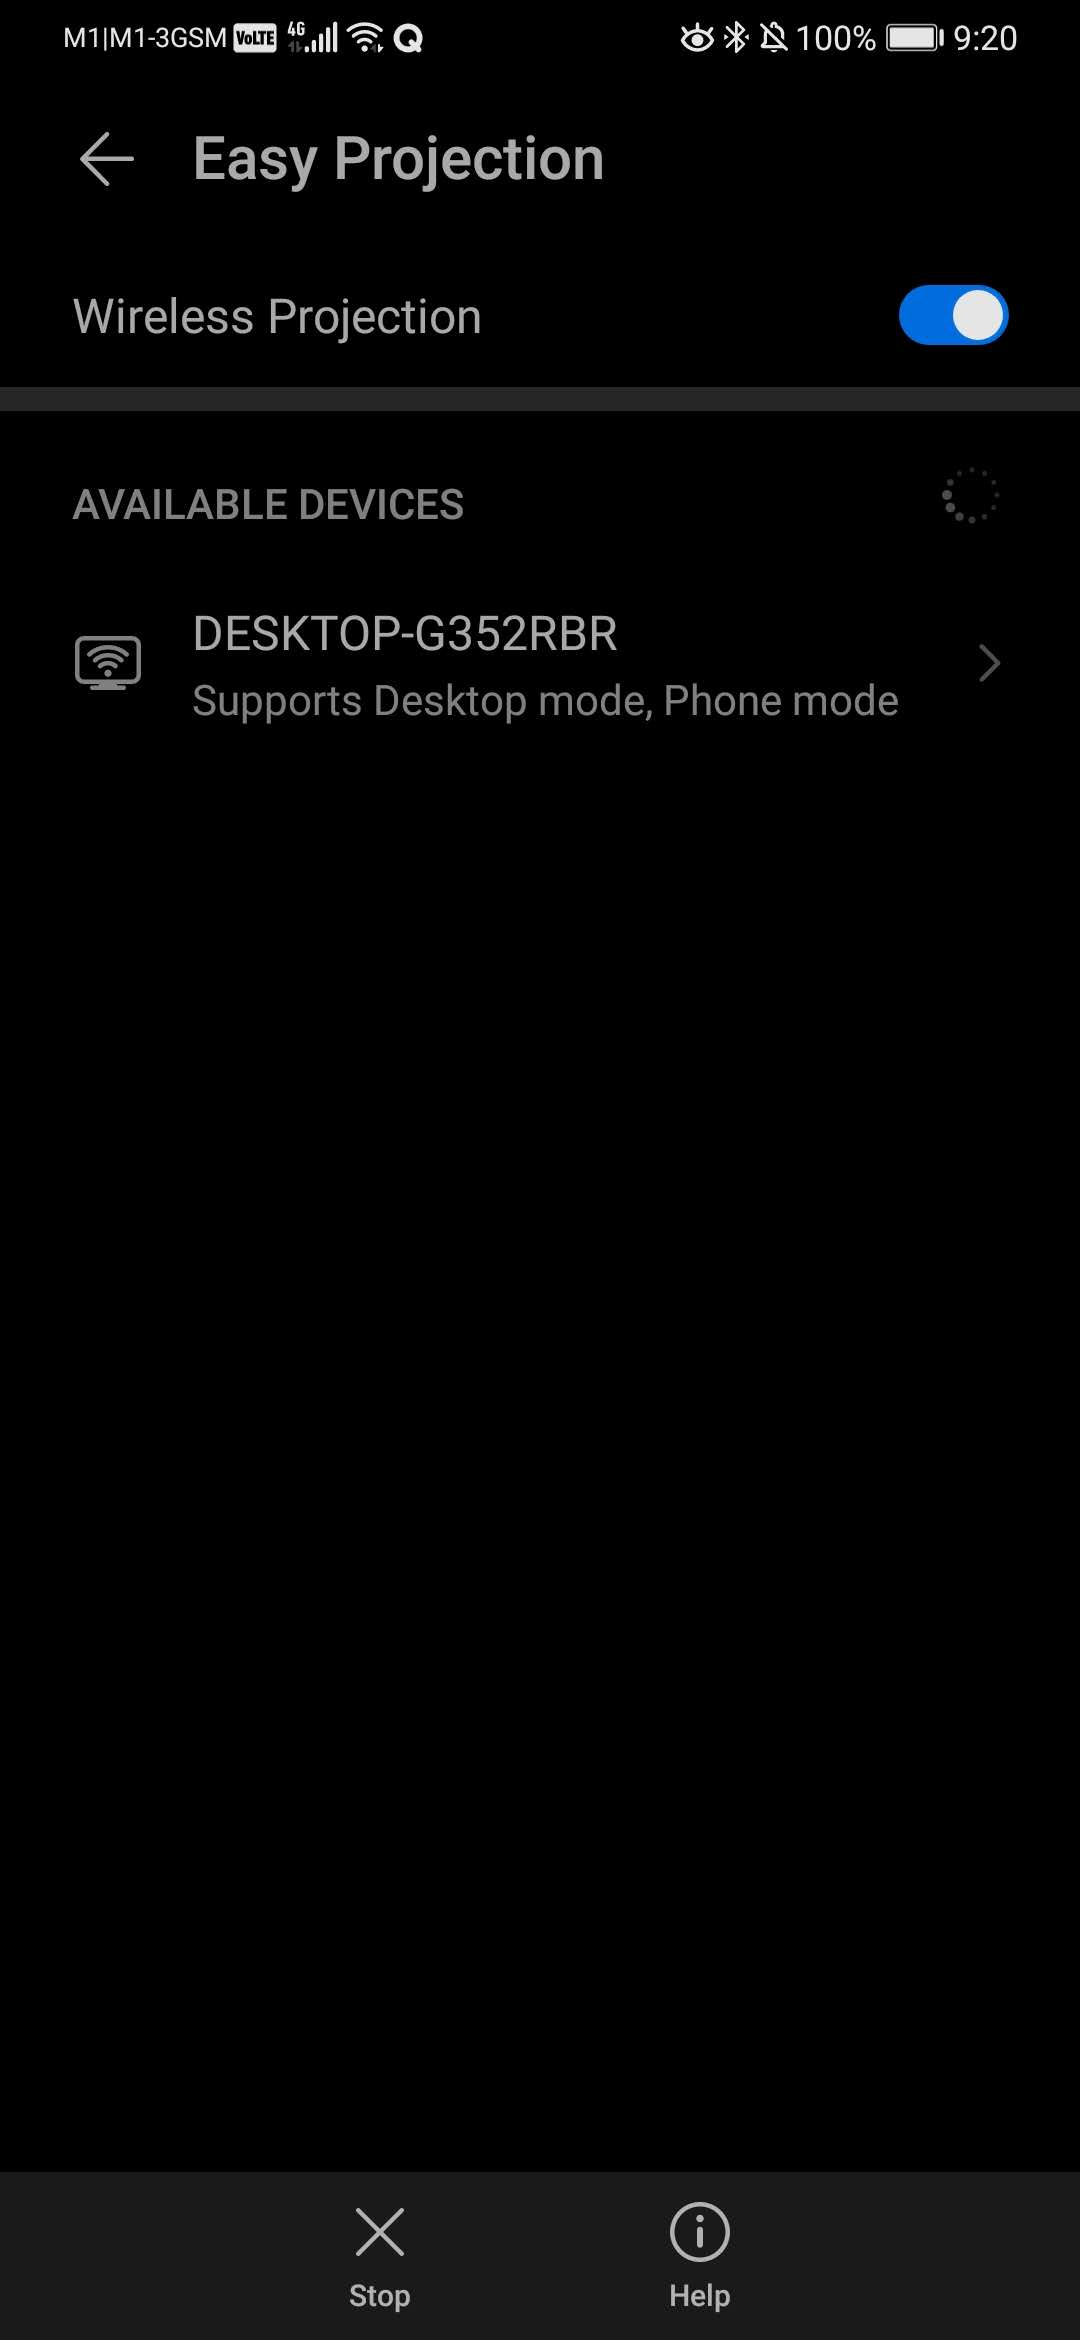
5. Turn on Wireless Projection and it will start to search the devices where you can project your phone to. Select the Windows 10 PC which you just set up and tap.
6. Now it will start to pair with the PC and connect to it.
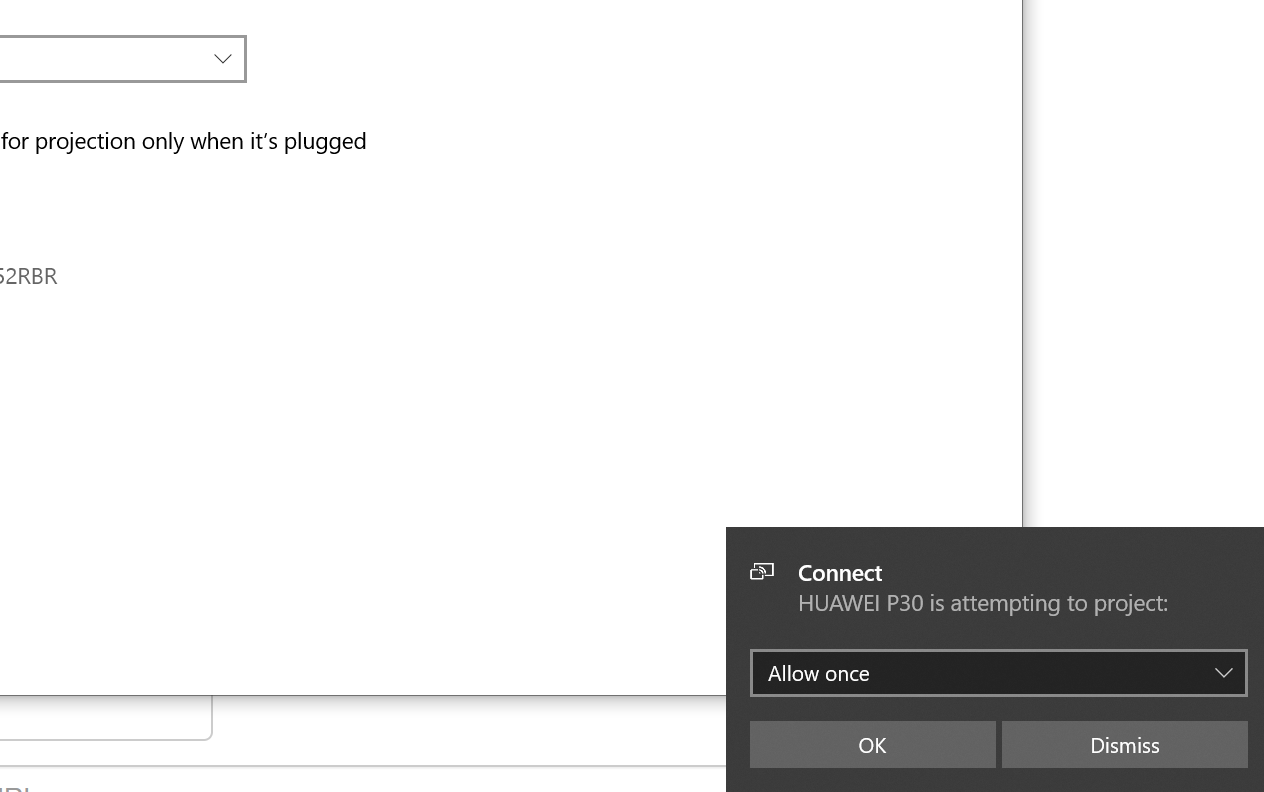
7. On you PC, it will prompt a notification to ask you to allow device connection. Choose Allow once or Always Allow.
8. Once connected, you will see that your phone is projected on your PC and every operation on your phone will be reflected on your PC as well.
9. Whenever you want to stop projecting, you can pull down the notification panel and disconnect from PC.

This is pretty simple now compared to past. This not only applies to phone projection to Windows 10 but also applies to other devices like tablets which support this kind of feature.