Have you ever tried to have two OSs installed on your PC? Do you want to try out the new Ubuntu system? If you do want to use Ubuntu when at the same time you are using Windows, you may want to install your Ubuntu in an VirtualBox. In this post, we will show you how to install Ubuntu in VirtualBox on Windows.
Pre-requisites
- VirtualBox -- You can download it from Oracle.
- Ubuntu -- You can download it from here. Please note it should be an ISO file
The Ubuntu used in this post is Ubuntu 12.04 LTS.
Installation
Step 1. Install the VirtualBox, it is like any other application installation on Windows
Step 2. Run VirtualBox, the main window will show up.
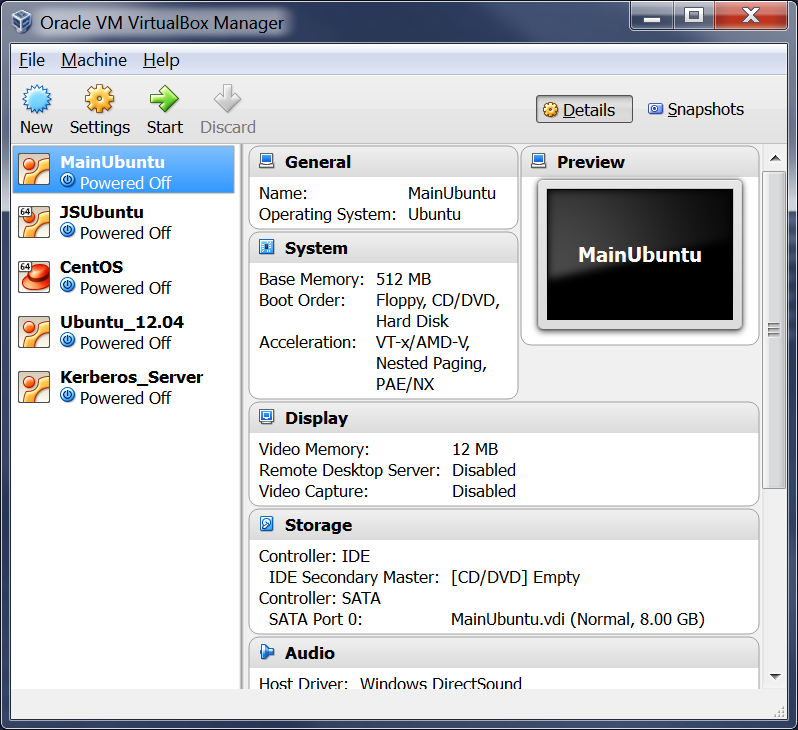
Now, click the New button to create a new instance(virtual machine).
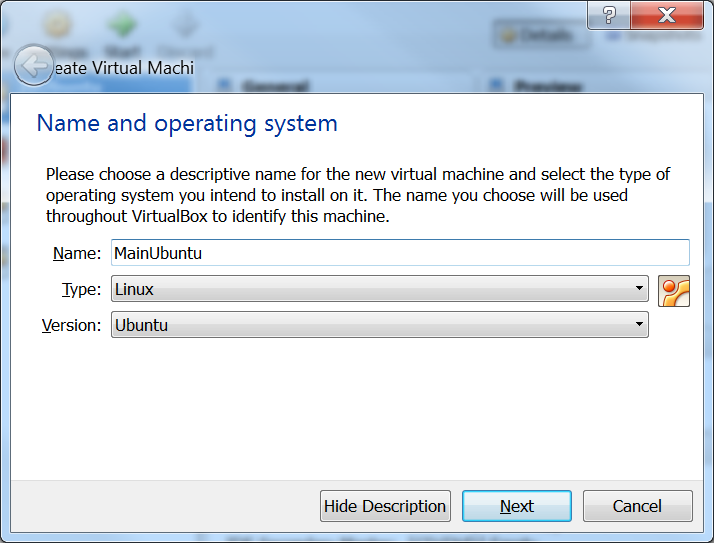
Step 3. Fill in the name of the virtual machine and the operating system you want to install. Here we choose Linux as the Type and Ubuntu as the Version.
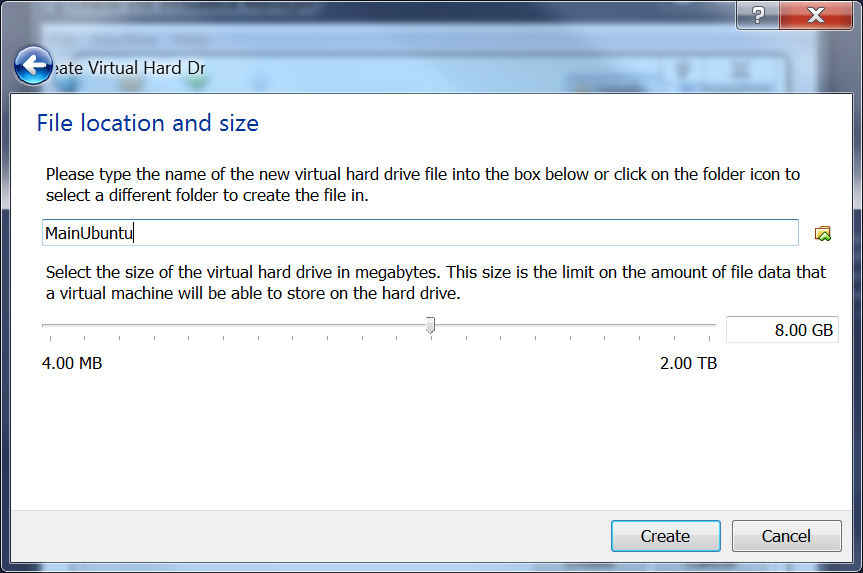
Step 4. Click Next until you see the below Window which asks you for the file location. You can just leave it and click Create. Now the virtual machine is created and you will see it in the left panel of the main window. Next we will start to install the OS.
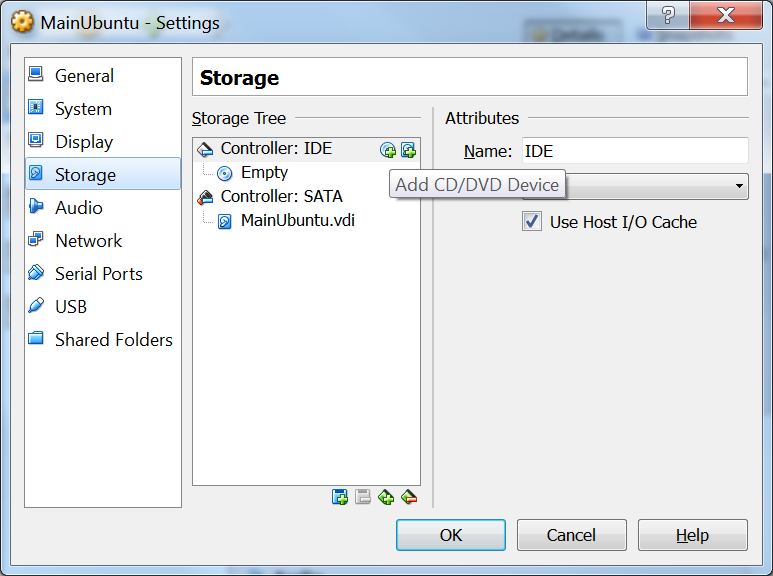
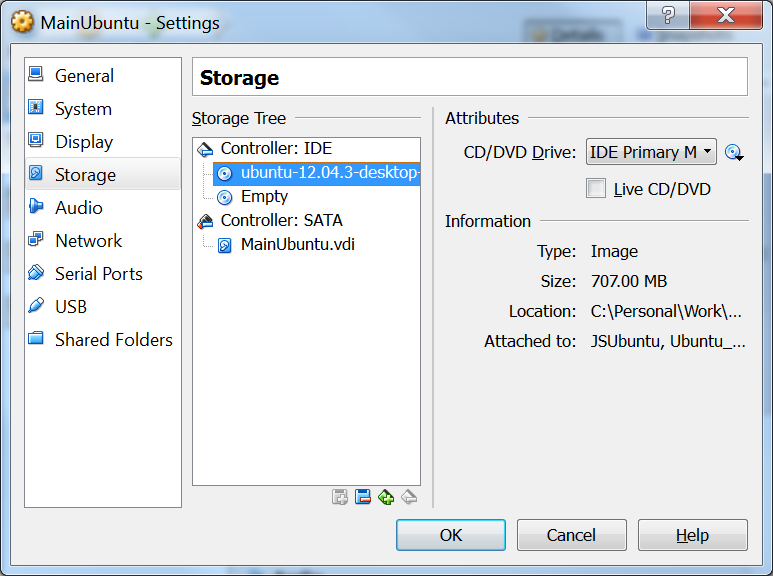
Step 5. Before really start installing the OS, we need to set up something. Click the Settings button. In the pop up window, we need to set the location of the Ubuntu ISO file we downloaded earlier. Click the Storage tab, then click the disc button with a plus sign on the right of Controller IDE tab. It will pop up the file selection window for selecting the ISO file.
Step 6. On the pop up window, navigate to the location where you put the downloaded Ubuntu ISO file.Once you selected the file, you will see below screen. We have told the virtual machine where the OS ISO file is. Next we will set the boot order.
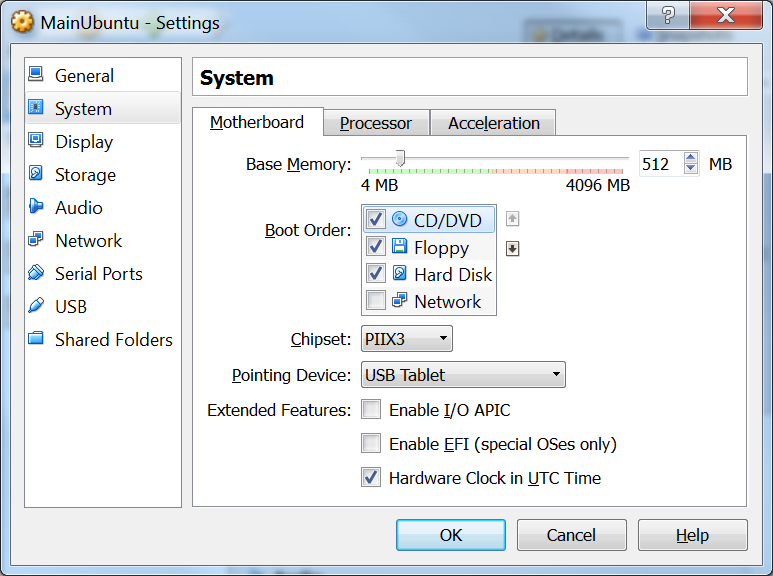
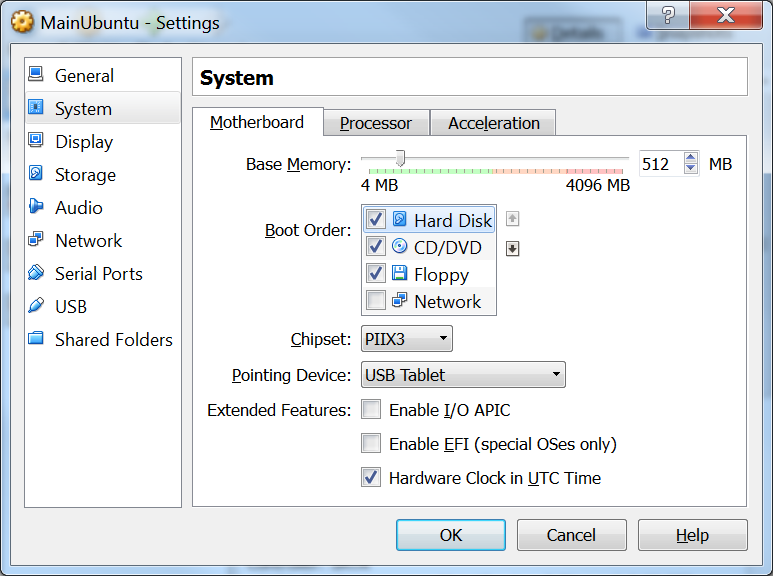
Step 7. Click the System tab. For the Boot Order area, select the CD/DVD item, then click the move up button the move the item to the below position.
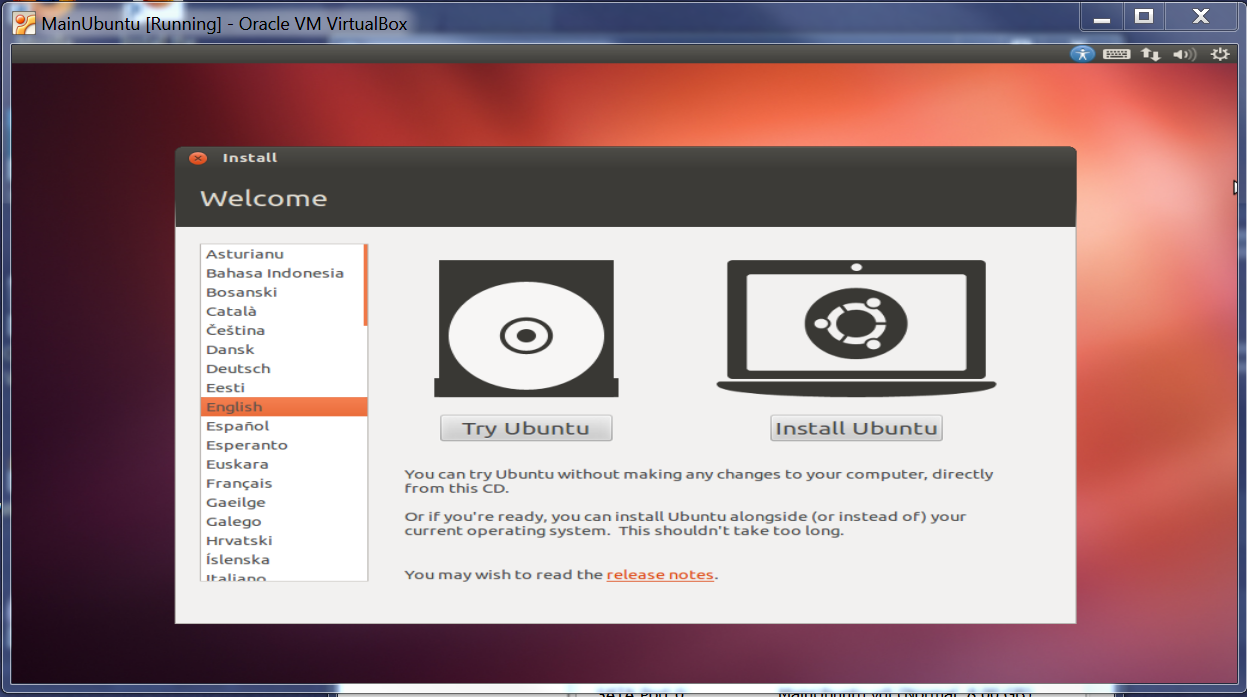
Step 8. Click OK now and we have completed all the settings before installation. Now click Start button on the main window to start the virtual machine. After a while, you will see below screen. Look familiar, right? Just follow the steps to install the OS in the virtual machine.
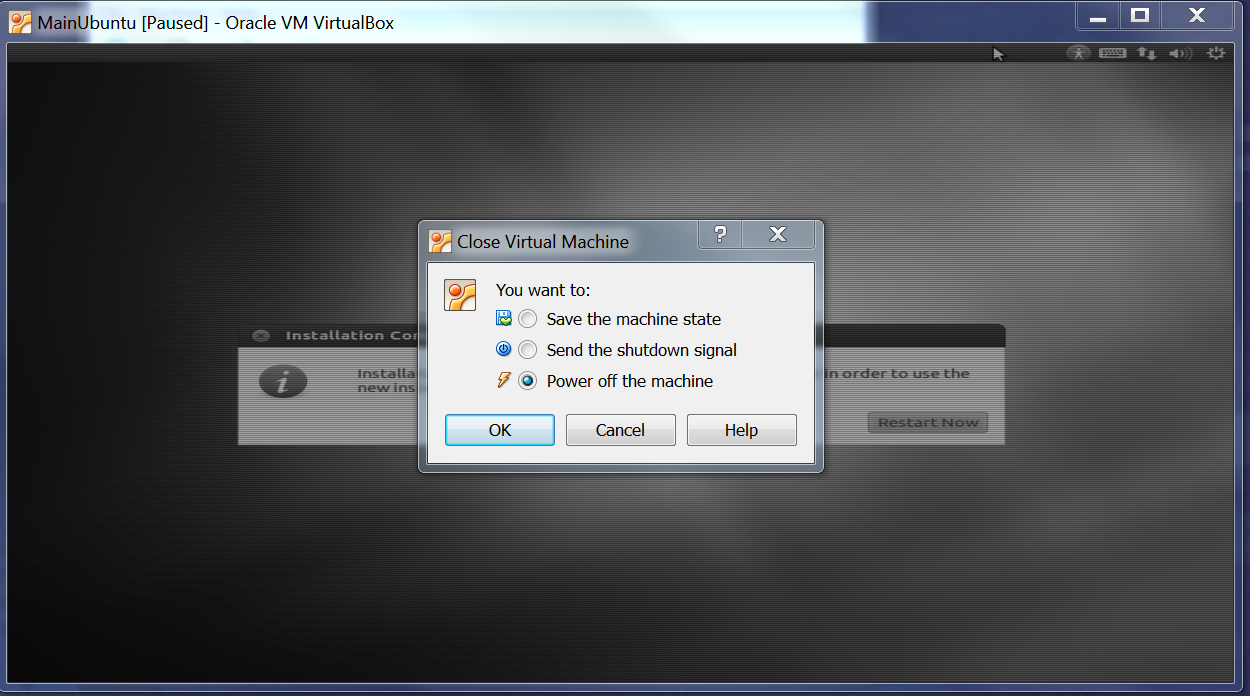
Step 9. Near the end of the installation, you will see a confirm window to ask you to shut down the system. Please do not click the Restart Now button. The reason will be explained later.
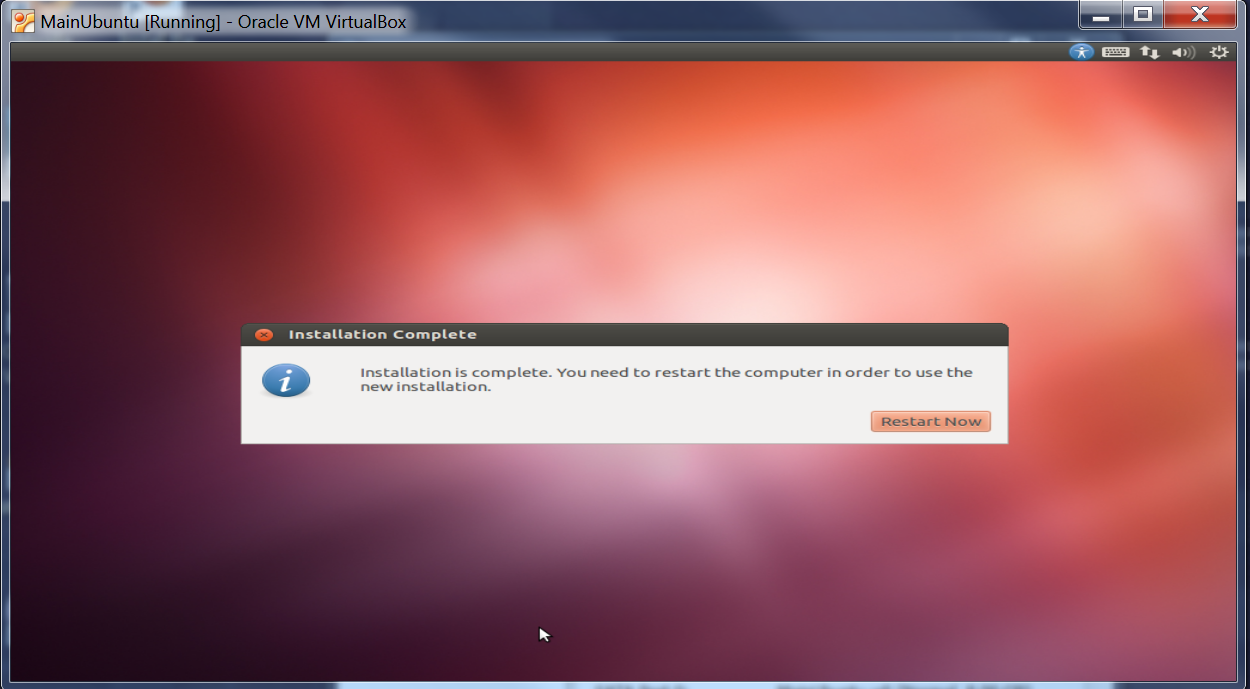
Instead we should click the close button on the right up corner of the virtual machine window. And select the Power off the machine to close the window. This is because if we click the Restart Now, the boot order is still from CD/DVD and it will ask you to install the OS again.
Step 10. We need to do some post installation setting. We now need to change the boot order of the virtual machine so that it will load the installed OS from hard disk. See below screenshot.
OK. Now you can start your virtual machine now. And after sometime you will see the familiar login screen. Congratulations, you have made it.